A/B testing
An A/B test serves two or more versions of a page to different visitors and measures which one converts better. You edit each version like any other page, split your live traffic between them, and Revyme tracks which one wins.
A/B testing is available on Pro and Studio.
Create a test
- Open Settings → A/B Tests, or right-click any page in the Pages panel and choose New A/B test….
- The test starts with two variants — Control (your original page) and Variant (a copy you can change).
- Open either variant and edit it like a normal page. Both share the same URL; visitors only ever see one.
Each variant shows up under the page in the A/B Tests sidebar, so you can jump between them and keep editing.
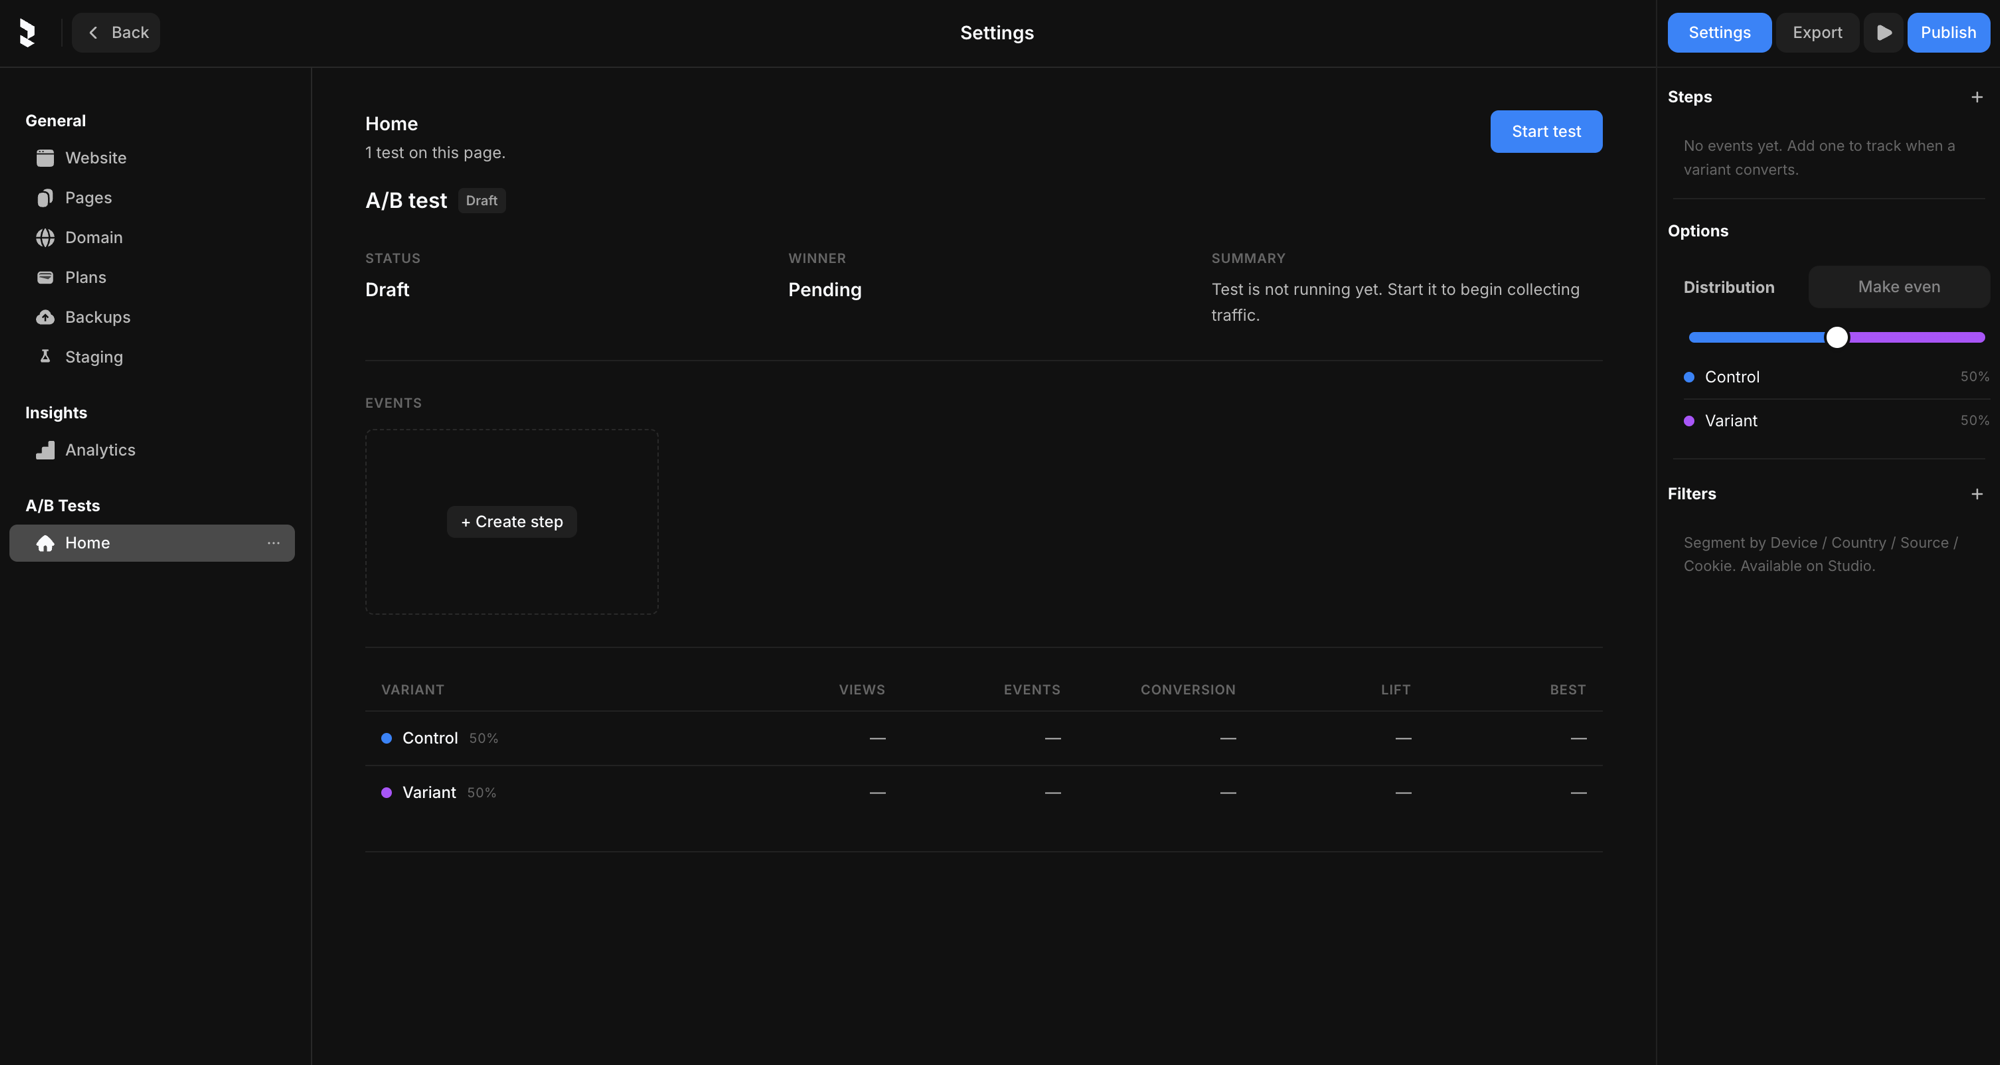
Distribution — how traffic is split
Distribution decides what share of visitors sees each variant. Drag the slider to weight one version more heavily, or hit Make even to reset every variant to an equal share.
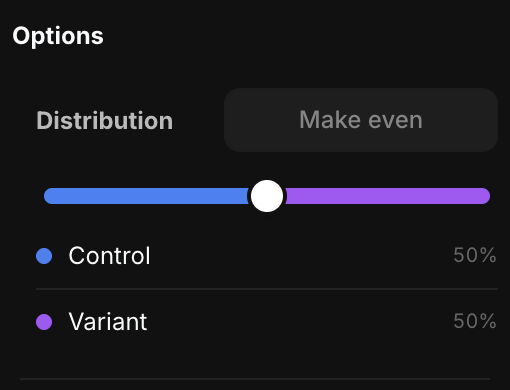
A 50 / 50 split is the fastest way to a clean result. Skew it (say 80 / 20) when you want most traffic on the proven Control while you cautiously trial a new Variant. Weights always add up to 100%.
Steps — what counts as a conversion
A step is a conversion event: it tells the test when a variant did its job. Until you add one, the test just measures views — it can't tell you which version actually performs better. That's why the panel reads "No events yet. Add one to track when a variant converts."
Press + Create step (or the + on the Steps panel) to open the New step dialog:
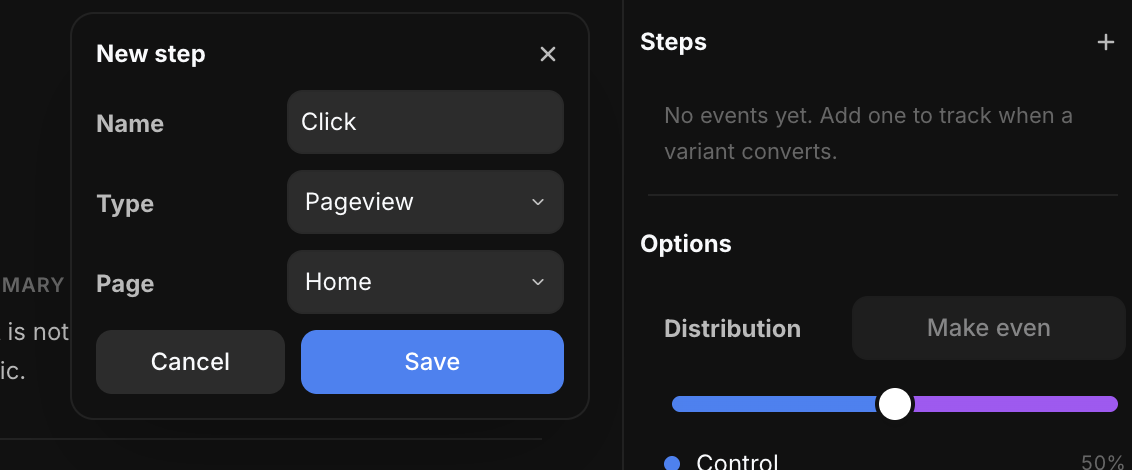
Give the step a Name, then pick a Type:
- Pageview — converts when the visitor reaches a Page you choose (e.g. a
/thank-youor checkout page). Great for "did they make it to the next step". - Click — converts when a visitor clicks a specific element you've tagged with a Tracking ID.
- Form Submit — converts when a form you've tagged with a Form ID is submitted.
- Custom — converts when your own code fires a named Tracking ID event.
A test can have several steps, so you can track more than one outcome at once.
Tracking IDs — tag the thing you want to measure
For Click, Form Submit, and Custom steps, you point the step at a Tracking ID — a short label you attach to an element. Select the element on the canvas, open the Navigation section of its properties, and type an ID into the Tracking field:
![]()
Give it something memorable like cta-hero or signup-form. Then, back in the New step dialog, set the Type to the matching event and choose that same Tracking ID — the dropdown lists every ID you've already used in the project. Now every click (or submit) on that element counts as a conversion for whichever variant the visitor saw.
Filters — segment your audience (Studio)
On Studio, the Filters panel restricts a test to part of your audience — segment by Device, Country, Source, or Cookie. Use it to run an experiment only on, say, mobile visitors from a specific campaign.
Run the test and read results
Use the buttons on the test to control it as it runs:
- Start test — begin serving variants and collecting data (Draft → Running).
- Pause — stop serving without discarding results; traffic falls back to the Control.
- Conclude — end the test and freeze the results.
While it runs, the results table fills in per variant: Views, Events, Conversion, Lift over Control, and the current Best performer. Running tests refresh about every 30 seconds, and a Winner is called once the data is clear.
Plans
- Pro — a classic A/B test: Control + one Variant, with up to two conversion goals per test.
- Studio — run many variants in one test (A / B / C / D … up to 26), with unlimited conversion goals and the audience Filters above.
Both plans let you run as many tests at once as you like.